JUL 30, 2025 • 6 MIN READ
Crafting Your Own TryHackMe Room: A Comprehensive Guide
Hi, guys, let’s build a TryHackMe Room together from scratch. I’ve encountered so many problems while designing my own custom lab environment and publishing it to TryHackMe, so I’m here to share my journey and help you avoid similar mistakes. While making mistakes is a valuable way to learn, it’s not the only way. Take this article as a guide to building and publishing your own room on TryHackMe. Let’s begin.
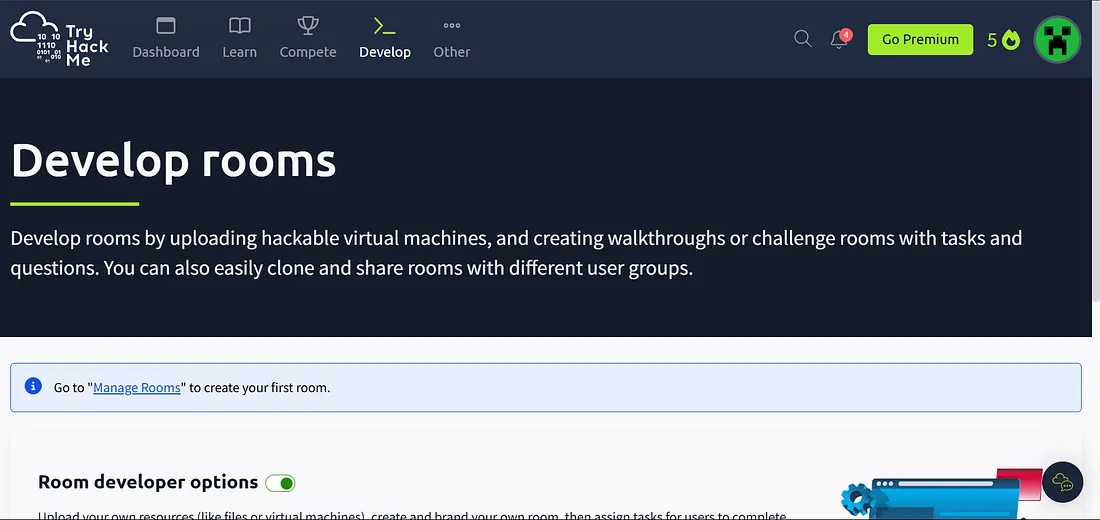
If you haven’t enabled the developer options on TryHackMe, you can just go to the “Develop Rooms” section under “Other options”; you’ll then get the developer tab, like this:
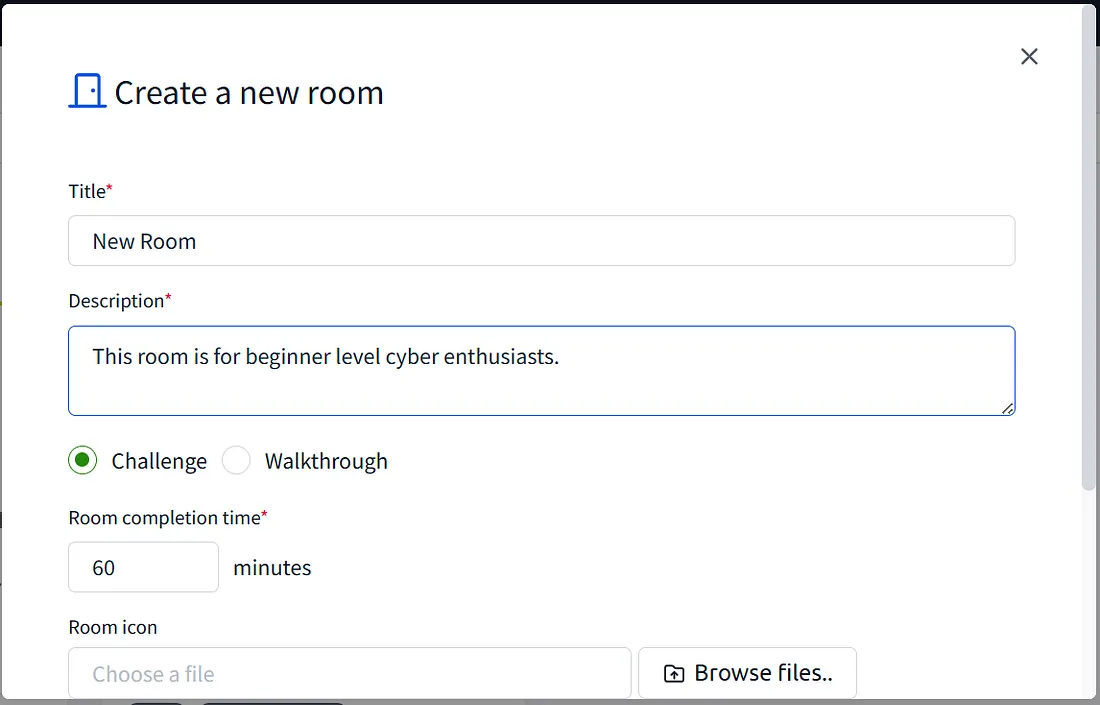
After entering the room’s Title and Description, choose what type of room you want to create, and then choose the Room icon of your choice. In the new room you’ve created, there are several options to manage it:
You can go through all the settings, but we’ll only cover the things that matter.
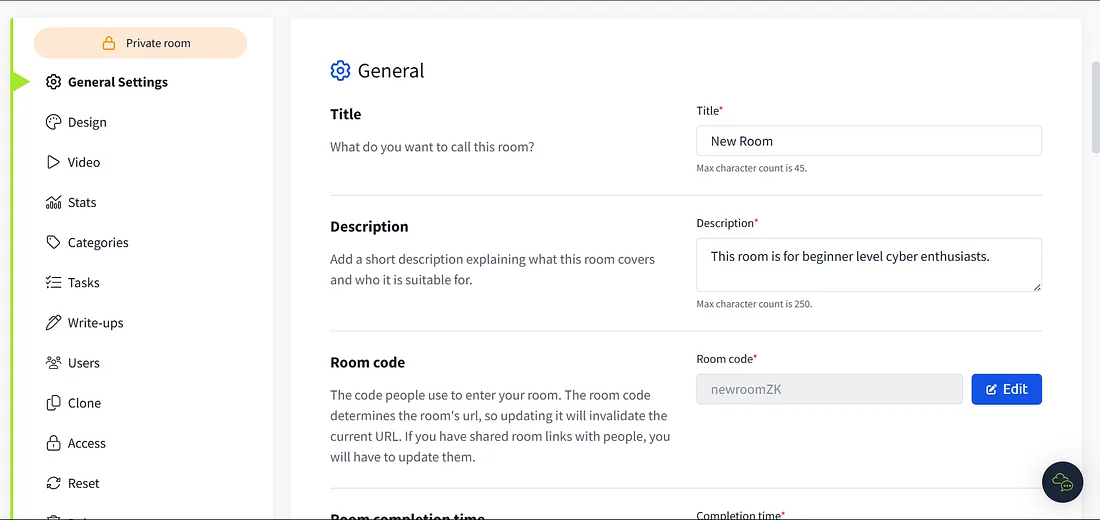
General Settings
- Room Code: As the description states, the Room Code is for other people who want to enter your room even though it’s not public.
- Difficulty: Set the difficulty of your room.
- Access: Do not turn it on until your room is fully designed, as this submits the room for evaluation, which might take months or, as I’ve heard, more than a year.
- Video: Embed a video that will be visible in the room, with a YouTube link.
- Categories/Tags: Improve the discoverability of your room by adding tags.
- Write-up: If you are designing a challenge, you will need to submit an official write-up before making the room public.
- Members: You can invite others to design your room with the link. Be careful here, because once someone accesses the link and becomes a member, they cannot be removed.
Tasks
Add a new task by clicking “Add task” in the top right corner.
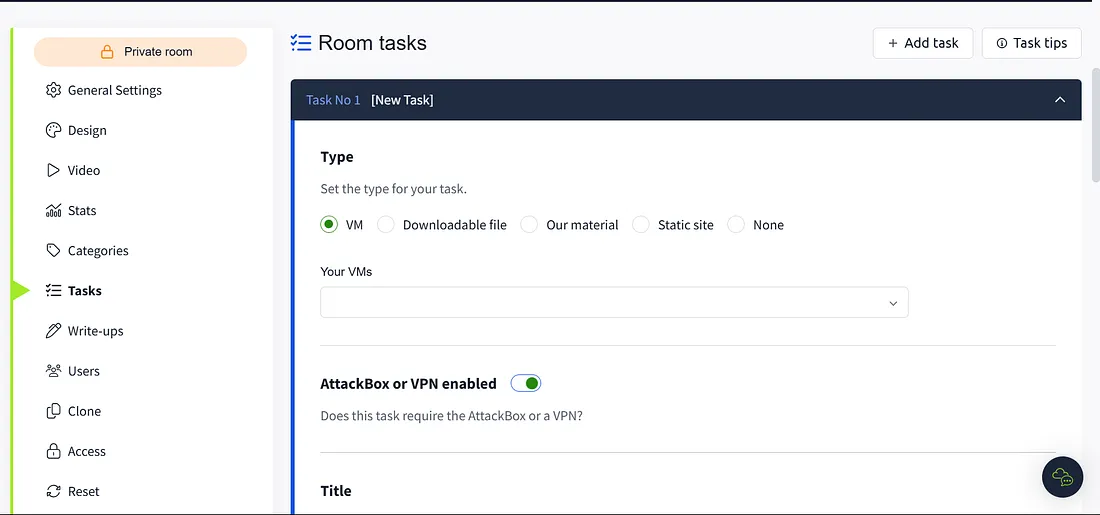
Set the type: If you wish to include a custom VM in your room, which most of us want to do, select “VM” under “Type”. But you first need to upload your VM to TryHackMe, which is the confusing part; we’ll get there in a minute. Enable the AttackBox or VPN, as users need to connect to the VPN to use your room, or they could use an AttackBox. Set your Task title and objective, and complete the Task content.
I have a suggestion here: you can give all your content to any popular AI models like Gemini or ChatGPT to structure it well and include code blocks, which you might face issues creating yourself. Update your questions at the end with required hints and answers.
Now, let’s go deep into VM creation and uploading.
VM Creation and Uploading
Most beginner creators face issues here and lose interest in designing the room, as you can only use specific low-end VMs so that they can be uploaded to the TryHackMe materials page.
Design your VM:
First, go through all the things on the https://tryhackme.com/upload page. Surprisingly, the given instructions are not enough to successfully upload your VM, for beginners at least. You should know that you can use your preferred VM to design your room’s lab environment, as it only matters to you.
As long as you use the stated Supported Virtual Machines on the upload page (be specific about the versions), you can upload it to TryHackMe. But the VM has to be a server image. Install the Server install image from here:
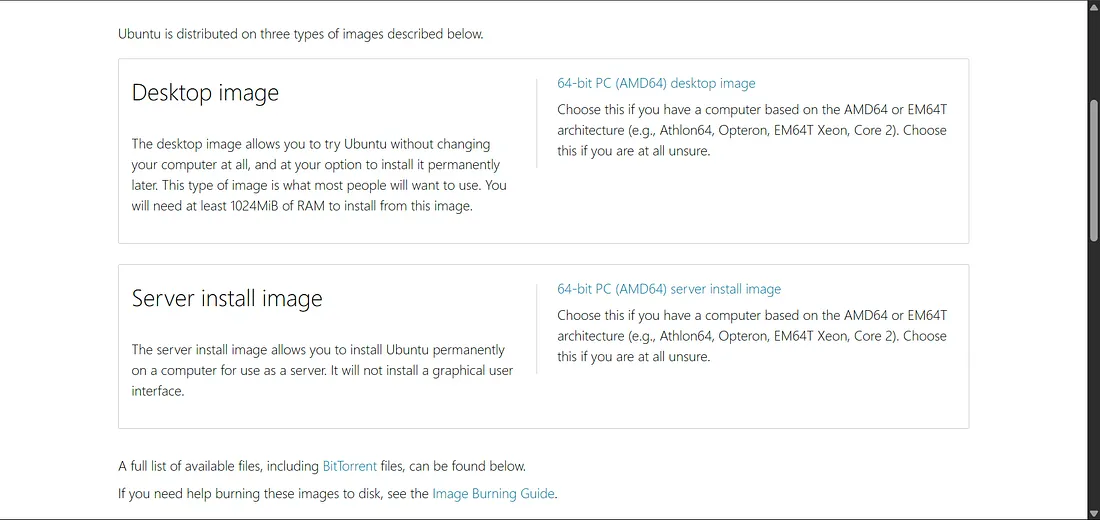
This consists only of a CLI, but you can install a basic GUI, which simplifies the design environment for us (there are plenty of YouTube tutorials on that). But be cautious when installing the GUI; choose the lightest interface possible, as the upload will fail if the size is too big. You can visit this page and know the exact numbers for the VM’s RAM and CPU cores.
I’m not going to explain the things in designing the environment of the room as it varies for each creator, but if you want any help, feel free to comment down so that I can make a new article on that.
How I did it?
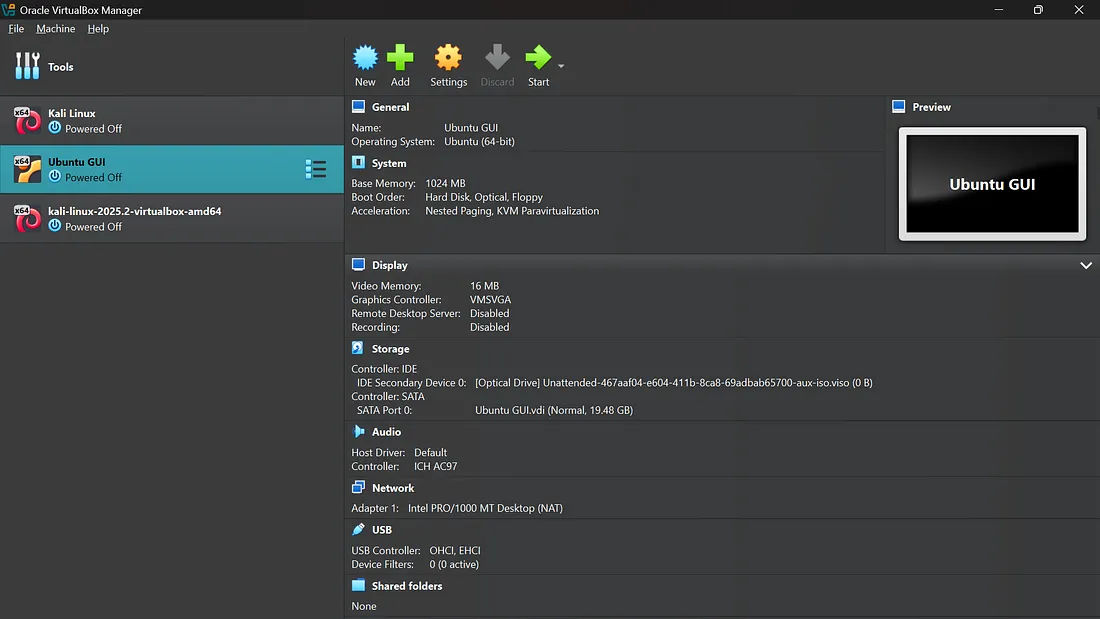
I used Ubuntu Version 22.04 and kernel 5.15.0 to design my lab environment. You just need to upload any of the specified VM versions, and TryHackMe will convert it on their own and provide the IP for users. I used Oracle VirtualBox Manager, and you can see the settings here:
After designing the lab environment, I exported the appliance from File -> Export Appliance:
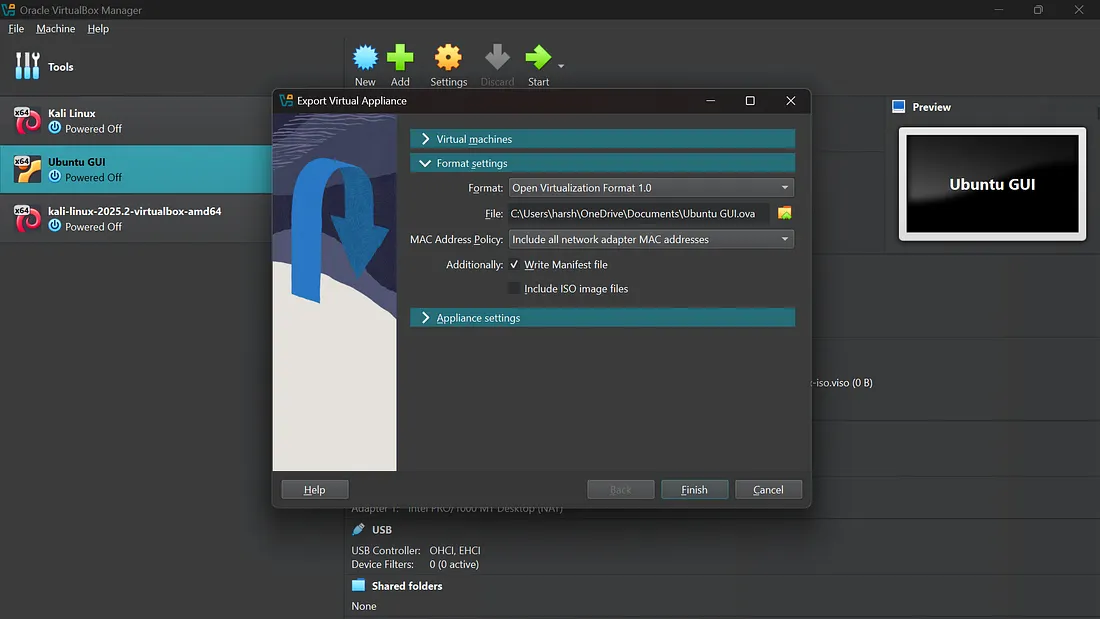
I included all network adapter MAC addresses and finished the exporting process. This resulted in an OVA file of around 1.5 to 2.5 GB.
Upload the OVA file
Go to https://tryhackme.com/upload and upload your OVA file, stating the title and description. Regarding SSH, RDP, and WEB, you can ask any AI model which one would suit your lab environment, as it depends on the type of lab environment. Upload and finish the process, which might take up to 10 minutes based on your OVA file size.
After uploading, go to the https://tryhackme.com/your-material page where you can see the conversion process. This might take 15 to 30 minutes; you can exit the tab as the conversion happens on their side. After a successful conversion, you can see the machine status:

If the conversion fails, you will get something like:

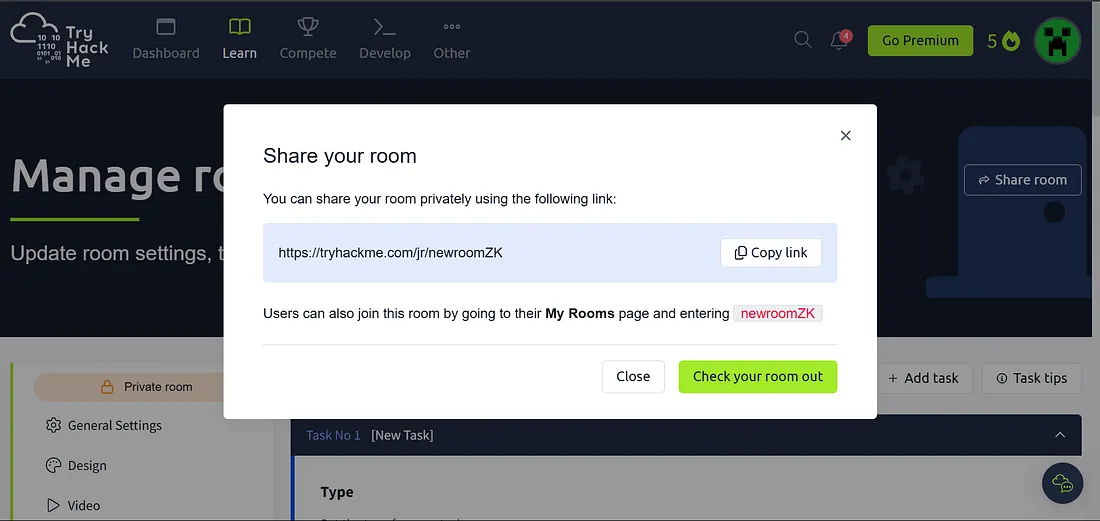
Be specific in following the explained steps to get a “successfully converted” message. Now, you will see the uploaded VM in the “Your VMs” dropdown on the tasks page. You can include your VM there. Add as many tasks as you want, and refine your lab yourself using the “Share room” option:
Check your room out and refine it as much as possible.
Make it publicly accessible
Toggle the “Publicly Accessible” button in general settings, which submits your room to the TryHackMe reviewers. The process may take several months, as there are so many creators submitting their rooms.
That wraps up our guide on crafting your TryHackMe room from scratch! I’m genuinely excited for you to start creating. Keep learning, keep building, and most importantly, have fun sharing your knowledge with the world.